While they bring back great memories for many people, MS-DOS games can be a little challenging to play on a modern computer. Luckily, there’s a way to make things easier.
Launchbox is a front end for your entire game library that has the bonus of making it much easier to launch your MS-DOS games.
Having said that, the process of getting your DOS titles into Launchbox can be a bit daunting. Read on to discover how to import your favorite old-school PC games into the software, no matter what format they’re arranged in.
Importing Pre-Installed MS-DOS Games Into Launchbox
Depending on how you get your hands on DOS games, they’ll come in various formats. The most common when downloading games for free from abandonware sites is as a pre-installed folder.
These folders typically don’t require any installation and contain everything that you’ll need to run the game from the get-go. Pre-installed games are the easiest to run via Launchbox, as you can select the correct folder.
Once you’ve got your pre-installed game downloaded somewhere on your PC, start Launchbox and follow the steps below.
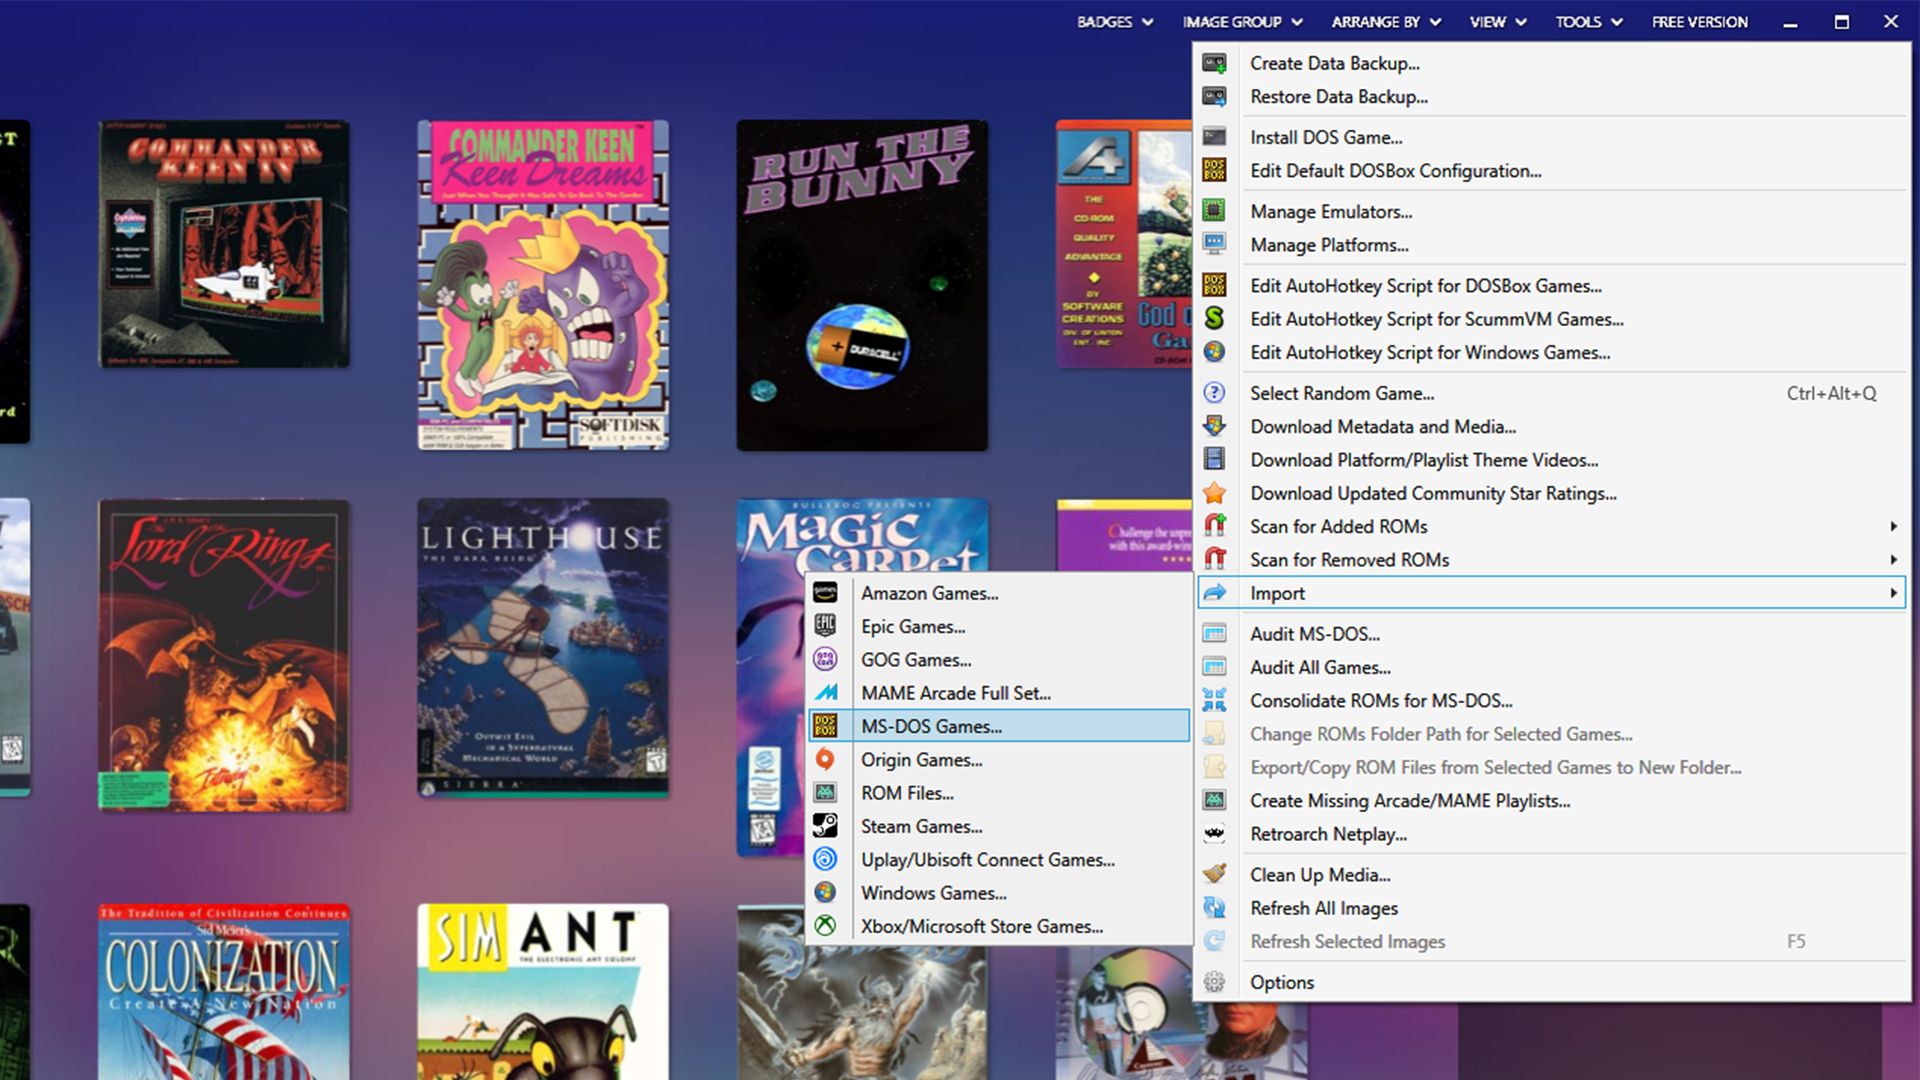
- Go to Tools > Import > MS-DOS Games.
- Click Next > Add Folder.
- Select the folder that contains your games. If you’re only trying to import a single title, choose the installation folder. Otherwise, pick whichever contains all of your games.
- After selecting your folder, click Next again.
- Pick from one of the three options from the following screen. The top two choices will move your games to the installation directory for Launchbox. The bottom option will leave them where they are.
- Regardless of the folder you choose, click on Next four times to get to the Ready to import window.
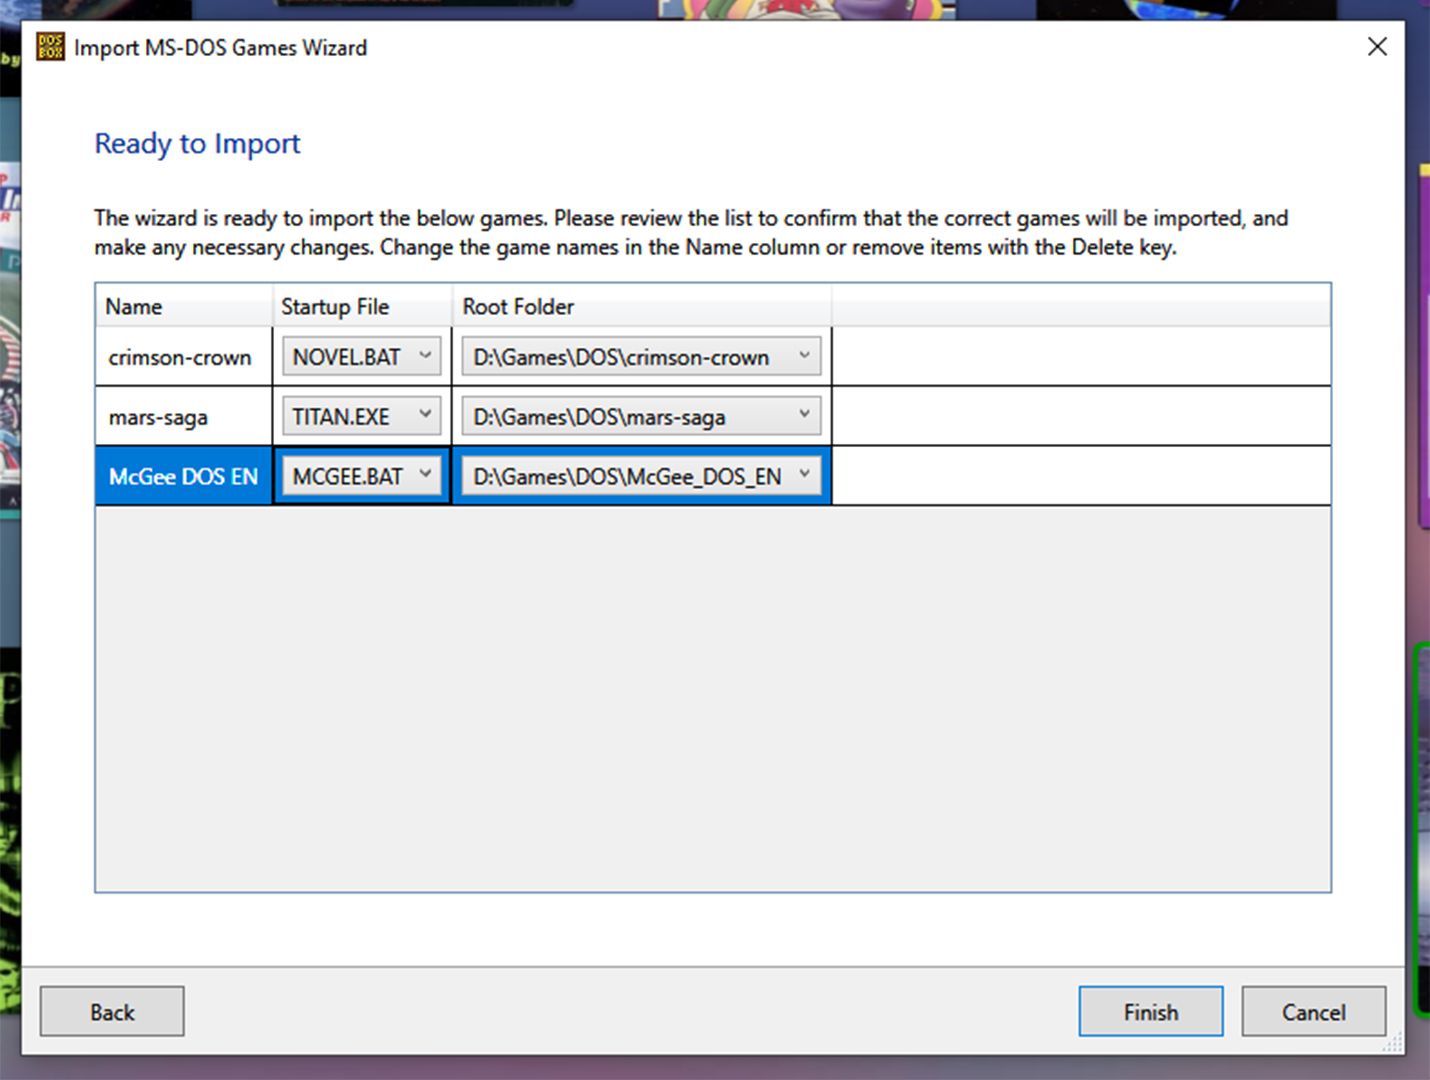
On this screen, you should see each game that you’re trying to import.
Launchbox takes all file names (see the Name column) from the folder that it found the game files in. So, you may need to change them manually. If the names are incorrect, change them.
Under Startup File, you can select an executable from the drop-down menu. You should click on the file that launches the game. Then click Finish.
If your game failed to launch, follow the steps below to fix the issue.
- Right-click on your game.
- Go to Edit.
- Click on Launching in the panel on the left.
- Find the Browse button at the top of the window.
- Choose a different file and try again.
Installing MS-DOS Games in Launchbox
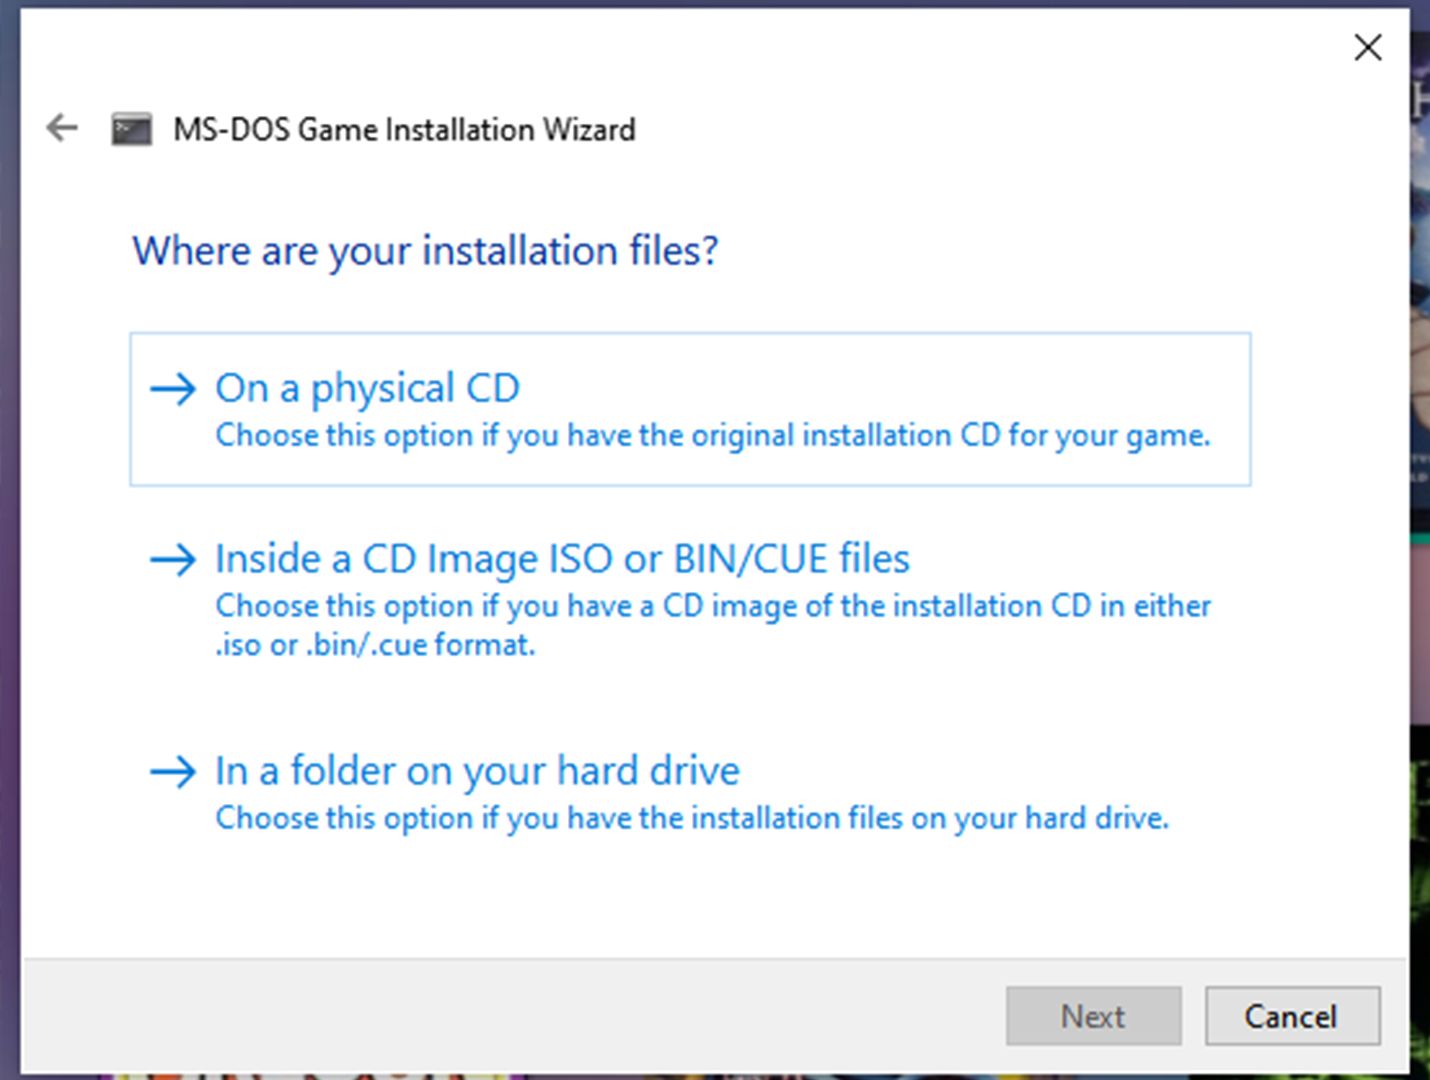
If you have your DOS game on a disc or as an installer, you’ll need to go through Launchbox’s MS-DOS game installer. Below are the steps you need to take for this.
- From the main page of the program, select Tools > Install DOS Game.
- Enter the retail name of the game you’re installing, and click Next.
- Select the bottom option to install a game instead of importing a pre-installed one.
- On the next screen, choose the place that your installation files are located.
Once you get this far, you’ll need to select a folder to install the game into. By default, the program will try to put the game in the Launchbox install directory.
If you normally have Launchbox copy or move your game folders for you, you can leave this as is. Otherwise, select the folder you normally keep your DOS games in.
If you’re installing from a disk image, Launchbox will ask you if you want to mount the image during installation automatically. You’ll also need to choose if you want to copy the disk image to the install directory.
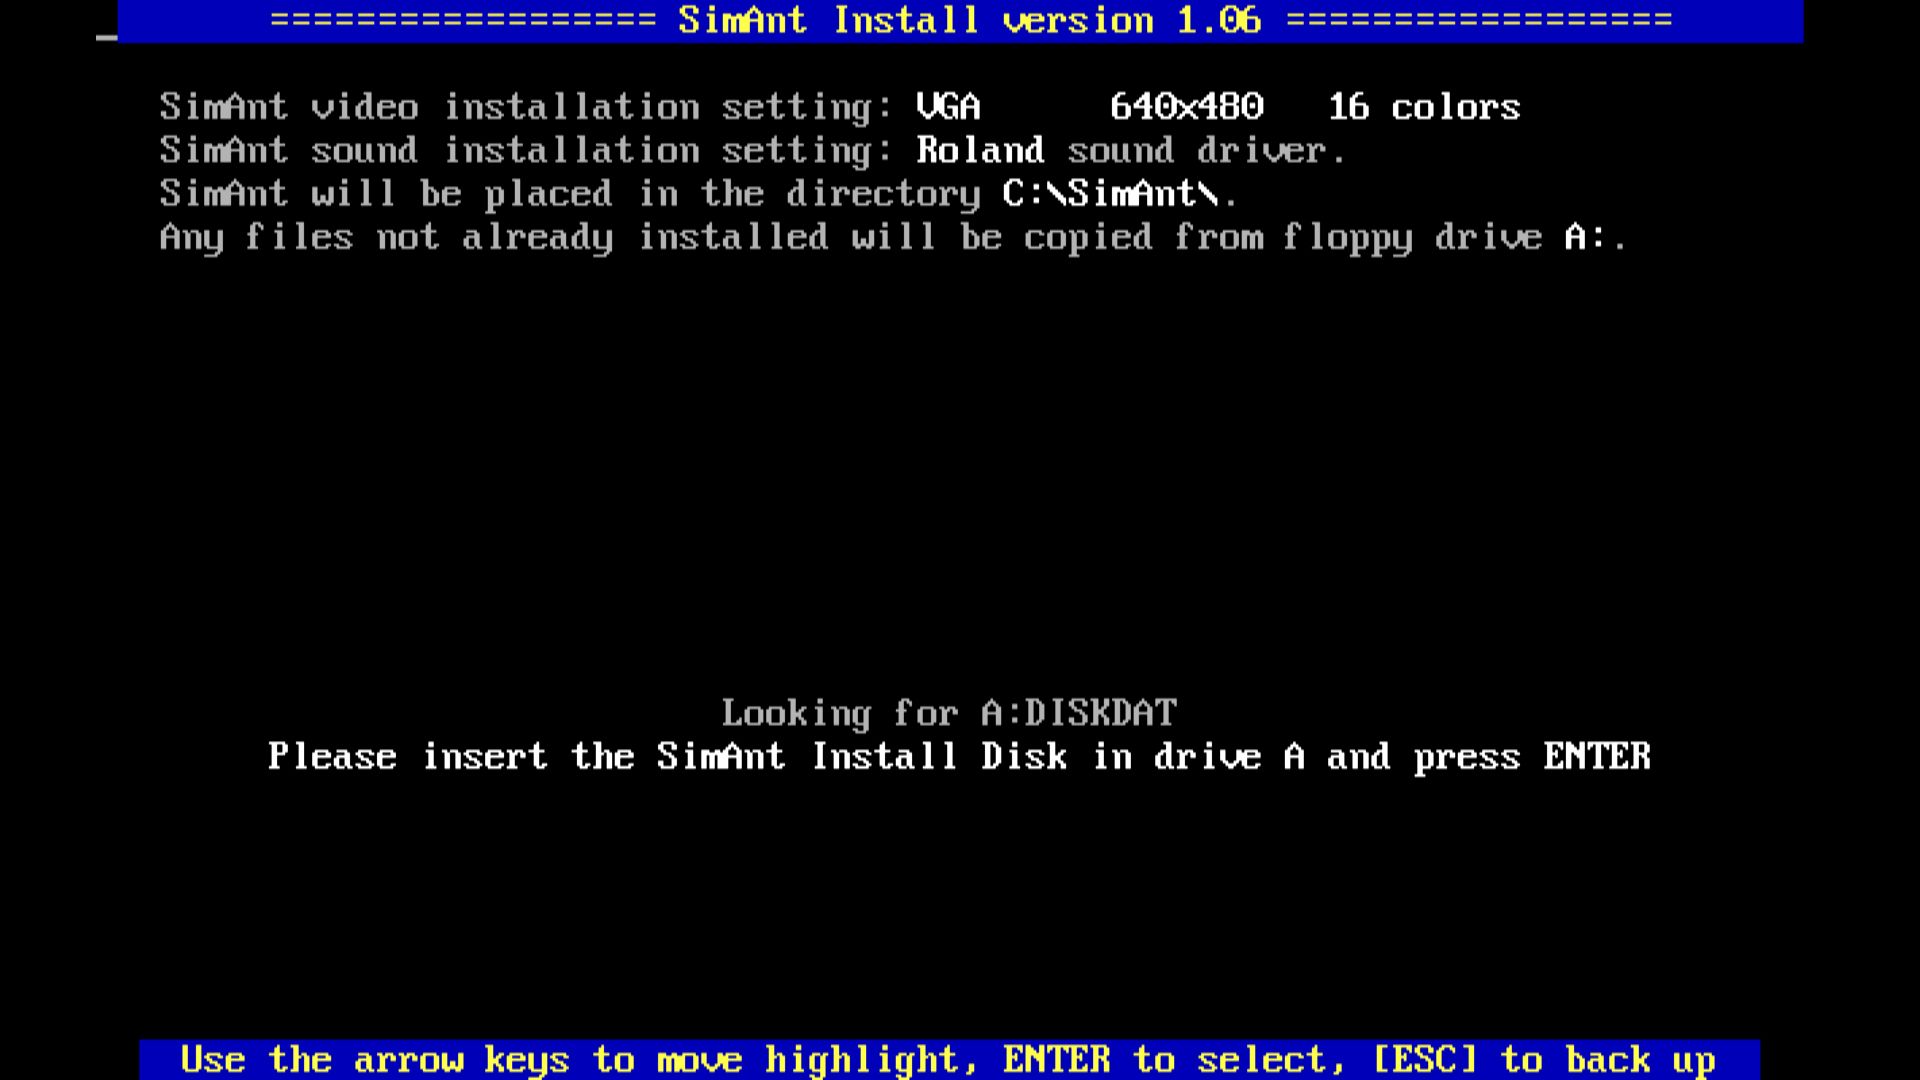
To begin the installation process, click Next. A DOSBox window will open, and the game will run through whatever installation process it is compatible with.
Launchbox will ask you to confirm that the installation was successful. Click on yes. It will then prompt you to select how you will launch the game, which you can find by clicking browse.
Once you’ve made your selection, click Next and Finish.
Once you have installed the game, you’ll see the metadata window. Click Search for Metadata and select your game from the list that appears to populate the various metadata fields automatically.
You can also go to the Images menu on the left to download your game artwork. Select OK when you’re done.
Mounting Multi-Disc Games in Launchbox
If one of your games has multiple discs, they may need extra setup before you can use them.
During the import process, Launchbox has set up the first disc of your game to mount automatically. This means you won’t need to mount the first disc, providing import went smoothly.
You can mount the remaining discs with a few tweaks, removing the need to swap during gameplay. The steps for this are below.
- Right-click on a game and select Edit.
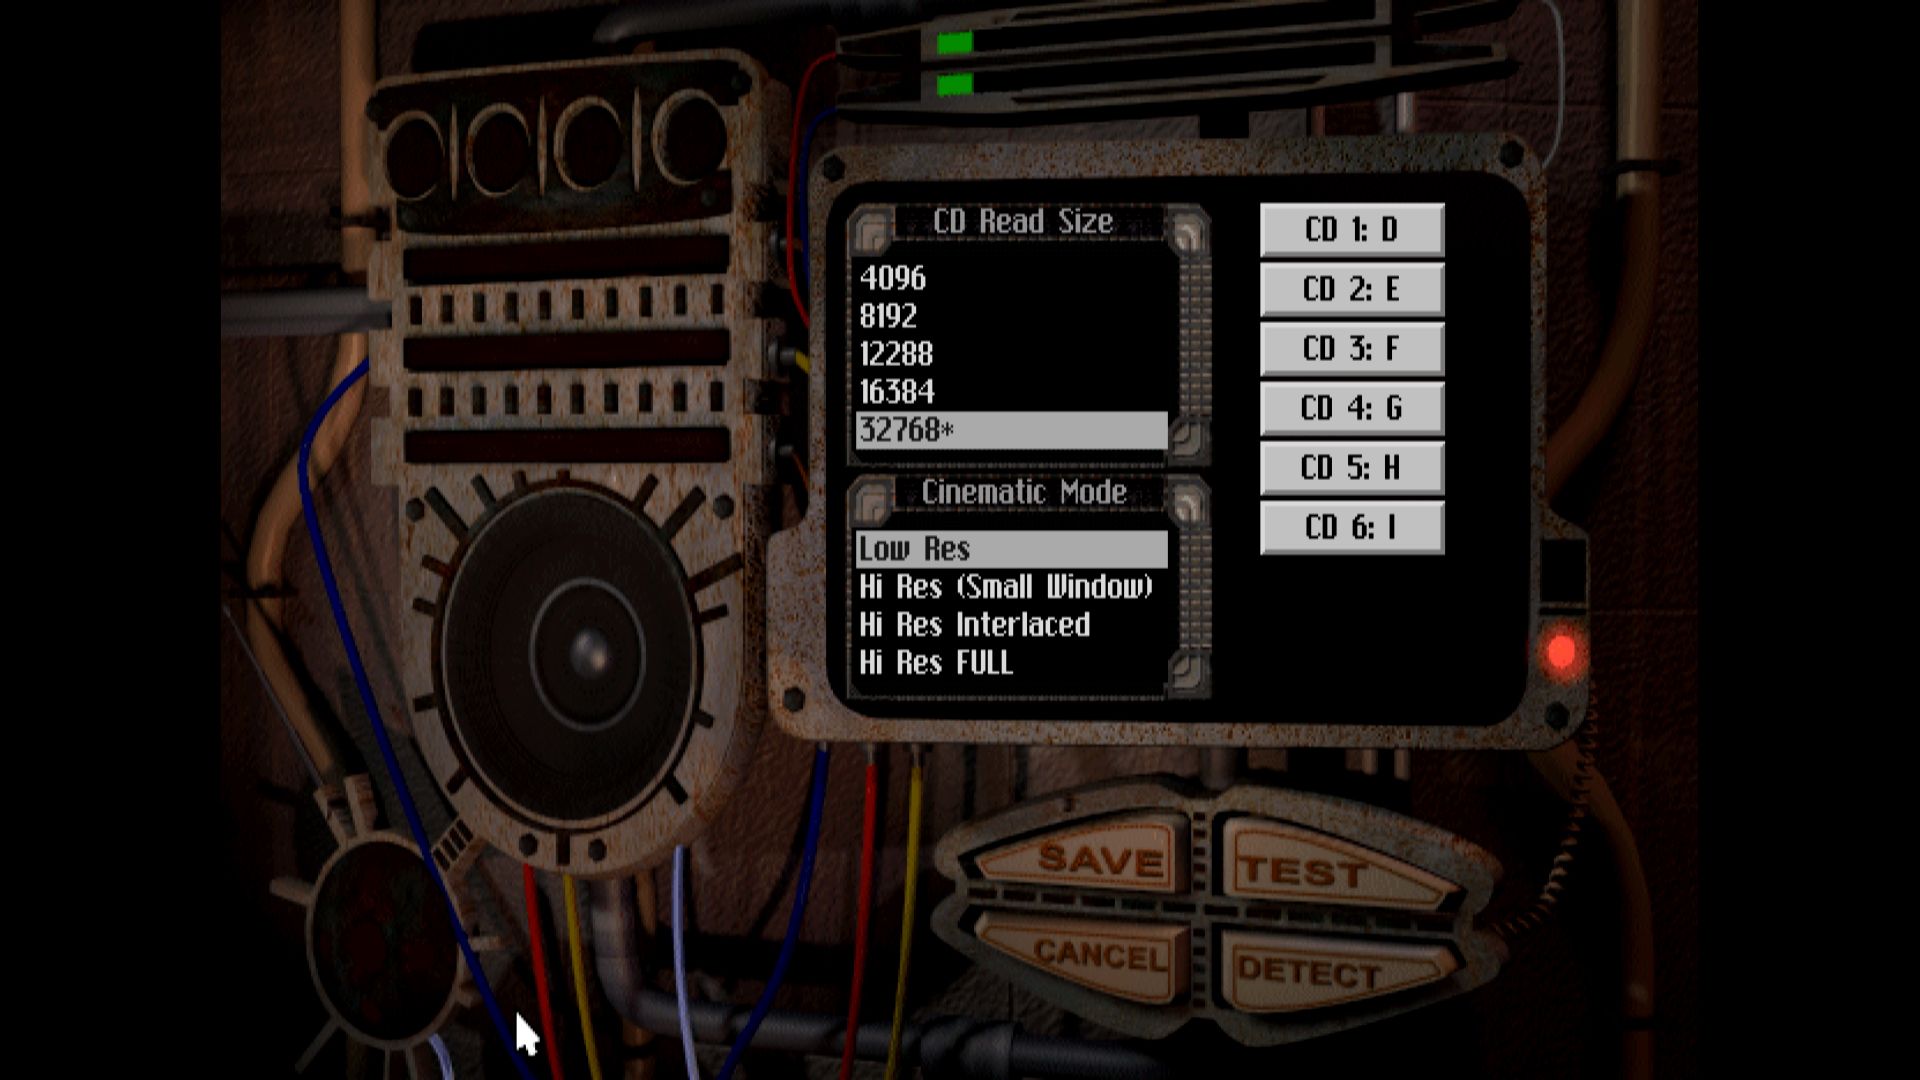
- In the Mounts panel on the left of the metadata window, you will see your first disc already mounted as drive D. Click Add Disc Image at the bottom.
- Select the next disc, mounting it as drive E.
Once you’ve got to this point, the steps outlined beneath will help you complete the process.
- Add each disc in order, moving through the alphabet letters until you have mounted all of your discs.
- Click OK to finish mounting your discs.
Depending on the game, you may need to run the install or setup command—and confirm which disc is in which drive before it’ll work.
You should check the manual for your game to determine how to run the setup or installation program, as each game uses different commands.
MS-DOS Imports Completed
So, there you have it. Now you know how to make MS-DOS games run in Launchbox. Even if your games span across multiple disks, you shouldn’t have any more problems using them.
Importing your files into Launchbox is pretty straightforward. Even if you make a mistake, you’ll have the chance to correct this later.
Once you’ve imported the rest of your game library, you’re all set for hours of fun. And if you’re looking for inspiration, consider checking out our guides on the best free PC games to play.