ProtonCalendar is an encrypted calendar app available to all ProtonMail users. In this article, we’ll show you how to access ProtonCalendar, set it up, and start managing your events efficiently and securely.
What Is ProtonCalendar?
If you’re looking for a schedule management app that’s both secure and feature-rich, look no further than ProtonCalendar. It can act as a replacement for Google Calendar, Outlook, and other popular calendar apps.
ProtonCalendar was developed by the team behind ProtonMail, an email service that takes pride in putting user privacy and security over profits. With the ProtonCalendar app, you can:
- Create multiple calendars and fill them with one-time and recurring events.
- Import calendars from other calendar apps.
- Color-code your calendars.
- Invite event participants and keep track of responses.
- Schedule custom notifications.
However, the primary reason people choose ProtonCalendar is that, like ProtonMail, it’s end-to-end encrypted. That means that no one can read it except you; even the Proton team cannot view your calendar. Events are private only to you and the participants you invite. Although you should keep in mind, your participants may use less secure calendar apps.
With end-to-end encrypted calendars, the platform cannot assess your schedule for the purposes of advertising. So, you won’t have advertisements for “Peter’s Party Platter Place” appearing when you schedule a get-together.
More importantly, this feature also ensures your privacy whenever there is a data breach or surveillance. If you’re a journalist, or another frequent subject of prying eyes, this feature is of utmost importance.
Since ProtonCalendar events are encrypted end-to-end, data should be secure even in the event of a compromise of its servers.
Download: ProtonCalendar for Android | Desktop (Free)
How to Start Using ProtonCalendar
As of this writing, ProtonCalendar is still in beta, but anyone with a free or paid ProtonMail account can access and use it. The mobile app is available for Android users, and the iOS version will be available soon.
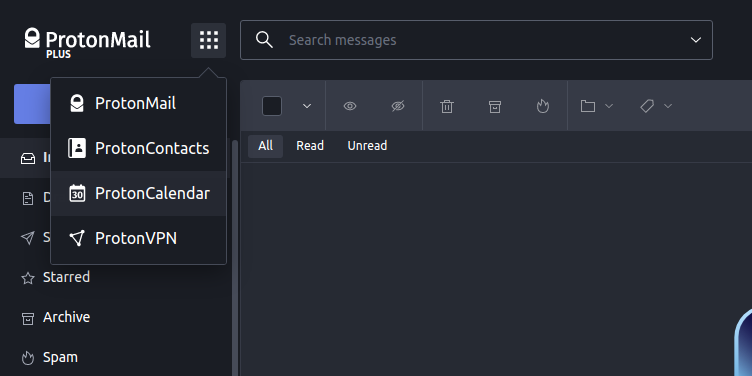
If you use the ProtonMail beta inbox, you can also use ProtonCalendar from the App selector at the top-left corner, next to the logo.
Switching to ProtonCalendar From Another Calendar App
Switching from your current calendar apps, such as Microsoft Outlook, Apple Calendar, or Google Calendar, may seem daunting. However, it is easy if you know what’s involved in exporting an ICS file.
Once you have it exported and saved on your device, follow these directions:
- In ProtonCalendar, create a new calendar (see below) to contain the imported events.
- Click on Settings followed by Calendars.
- In the Import section, click Import calendar.
- Drag and drop your ICS file into the calendar import, or browse for its location.
- Choose the calendar you created to receive the exported calendar, and click Import.
- Wait for the import process to complete. Effective encryption takes time, so be patient.
ProtonCalendar may warn you that there are certain elements from your calendar that it cannot import. Additionally, you can only add 15,000 events to a calendar at a time. If you have more than that, be prepared to break up your file into smaller chunks.
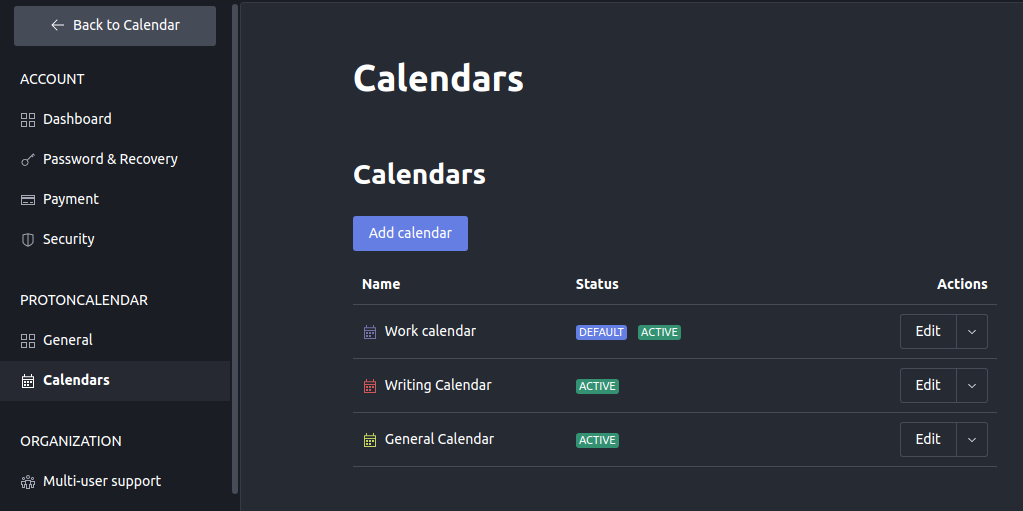
Creating and Managing Calendars
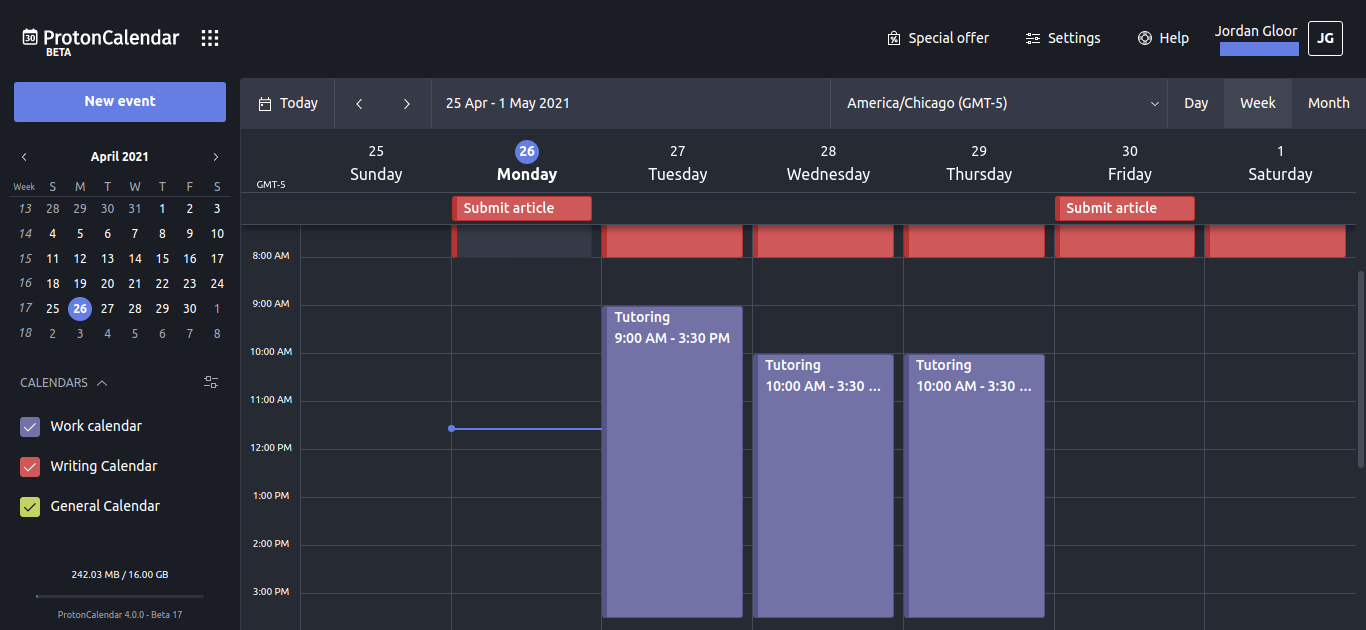
ProtonCalendar allows you to manage multiple calendars at the same time. So, you can also have different calendars for work, freelance, personal, birthdays, etc. In total, you can create ten calendars, which you can alternate among or overlay whenever you like.
In ProtonCalendar, click Settings and then Calendars. Click New Calendar, or click Edit next to any existing calendar whose settings you want to adjust.
In the Calendar settings tab, you can give your calendar a name and color, choose a default email, and write a short description that’s visible only to you.
This default email address is used to send invitations to events, and you will be credited as the organizer when you use this email address. Ensure you know if you have ProtonMail accounts with multiple addresses, since you cannot change the default email address of a calendar after choosing it.
One more important reminder about calendars is that you need to choose the correct one to be your default calendar. The default calendar will be the one you’ll most frequently be creating events on. Optimize productivity by choosing the calendar that makes the most sense for you.
Click the Event settings tab to adjust the defaults for newly created events’ durations and notifications.
Creating Secure Events
Creating secure events in ProtonCalendar is easy. Click Create Event to get started and follow a few simple steps to complete the process. You can read more about the ProtonCalendar app by learning how to create and manage some events.
Receiving Event Invitations
Any time someone sends you a ProtonMail invitation to participate in an event, you’ll have the option to accept, reject, or “maybe” the invitation directly from your inbox. If you accept it, ProtonMail will automatically add the event to your ProtonCalendar.
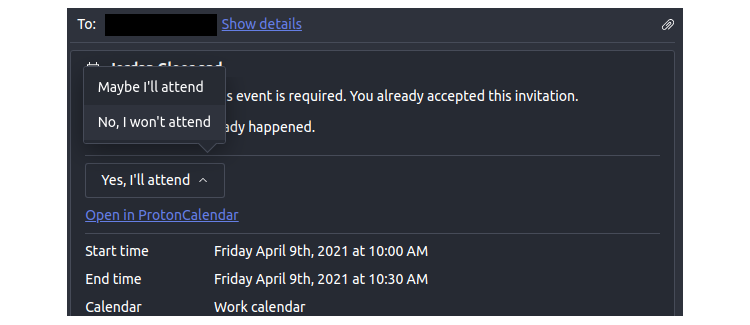
Note that ProtonMail will add the event to whichever calendar you have set as your default calendar. If you want it in a different calendar, you’ll have to click the event in ProtonCalendar and edit it.
Managing Notifications
ProtonCalendar lets you set up notifications, so you get notified for each event. You may have up to 10 notifications per event, and you can set them to minutes, hours, days, or weeks before the event.
Keep in mind that you’ll only see these notifications if you’re logged into the mobile app. If you have the web app open, you can see notifications only if you’ve enabled desktop notifications for ProtonCalendar in your web browser.
Calendar Management Made Secure
After setting up ProtonCalendar and scheduling your days, you should feel both productive and secure. You can protect your calendar from being scraped for advertising and viewed by bad actors.
If you’re accessing ProtonCalendar using Chrome, you should be aware that that’s yet another security threat. Make sure that you’re not allowing Google’s browser access to your private data.